
Flossing with braces can be a bit tricky, but when done correctly it is an important part of oral hygiene for those who wear braces. Flossing with braces helps to remove plaque and food debris from between your teeth, where your toothbrush can’t reach. It also helps to prevent gum disease and cavities from developing around the brackets on your teeth. With the right technique, you can easily learn how to floss back teeth with braces.Flossing with braces can be tricky, but it’s essential to maintain good oral hygiene. To floss your back teeth with braces, start by cutting off a piece of floss about 18 inches long. Then, wrap the ends around your middle fingers and hold the floss tightly between your thumbs and index fingers. Guide the floss between each tooth and gently slide it up and down along each side of the tooth to remove any food particles. When you get to a wire, use a back-and-forth motion to get underneath it. Make sure to clean around every tooth, including the molars in the back of your mouth. After you’re done, be sure to rinse your mouth with water or mouthwash.
Introduction to Flossing with Braces
Flossing with braces can be a bit tricky, but it’s important to make sure you are flossing your teeth properly and consistently while wearing braces. Flossing is an important part of oral hygiene and should be done regularly, even when wearing braces. With the right technique, flossing can help keep your teeth healthy and free of food and plaque buildup. Here’s what you need to know about flossing with braces.
When flossing with braces, it’s important to use a longer piece of floss than you would normally use. This will help you maneuver around the wires of your braces and get between teeth more easily. It’s also important to use a waxed type of dental floss, as this will help the floss slide between teeth more easily. You should also use a gentle up-and-down motion when sliding the floss between your teeth, rather than sawing back and forth.
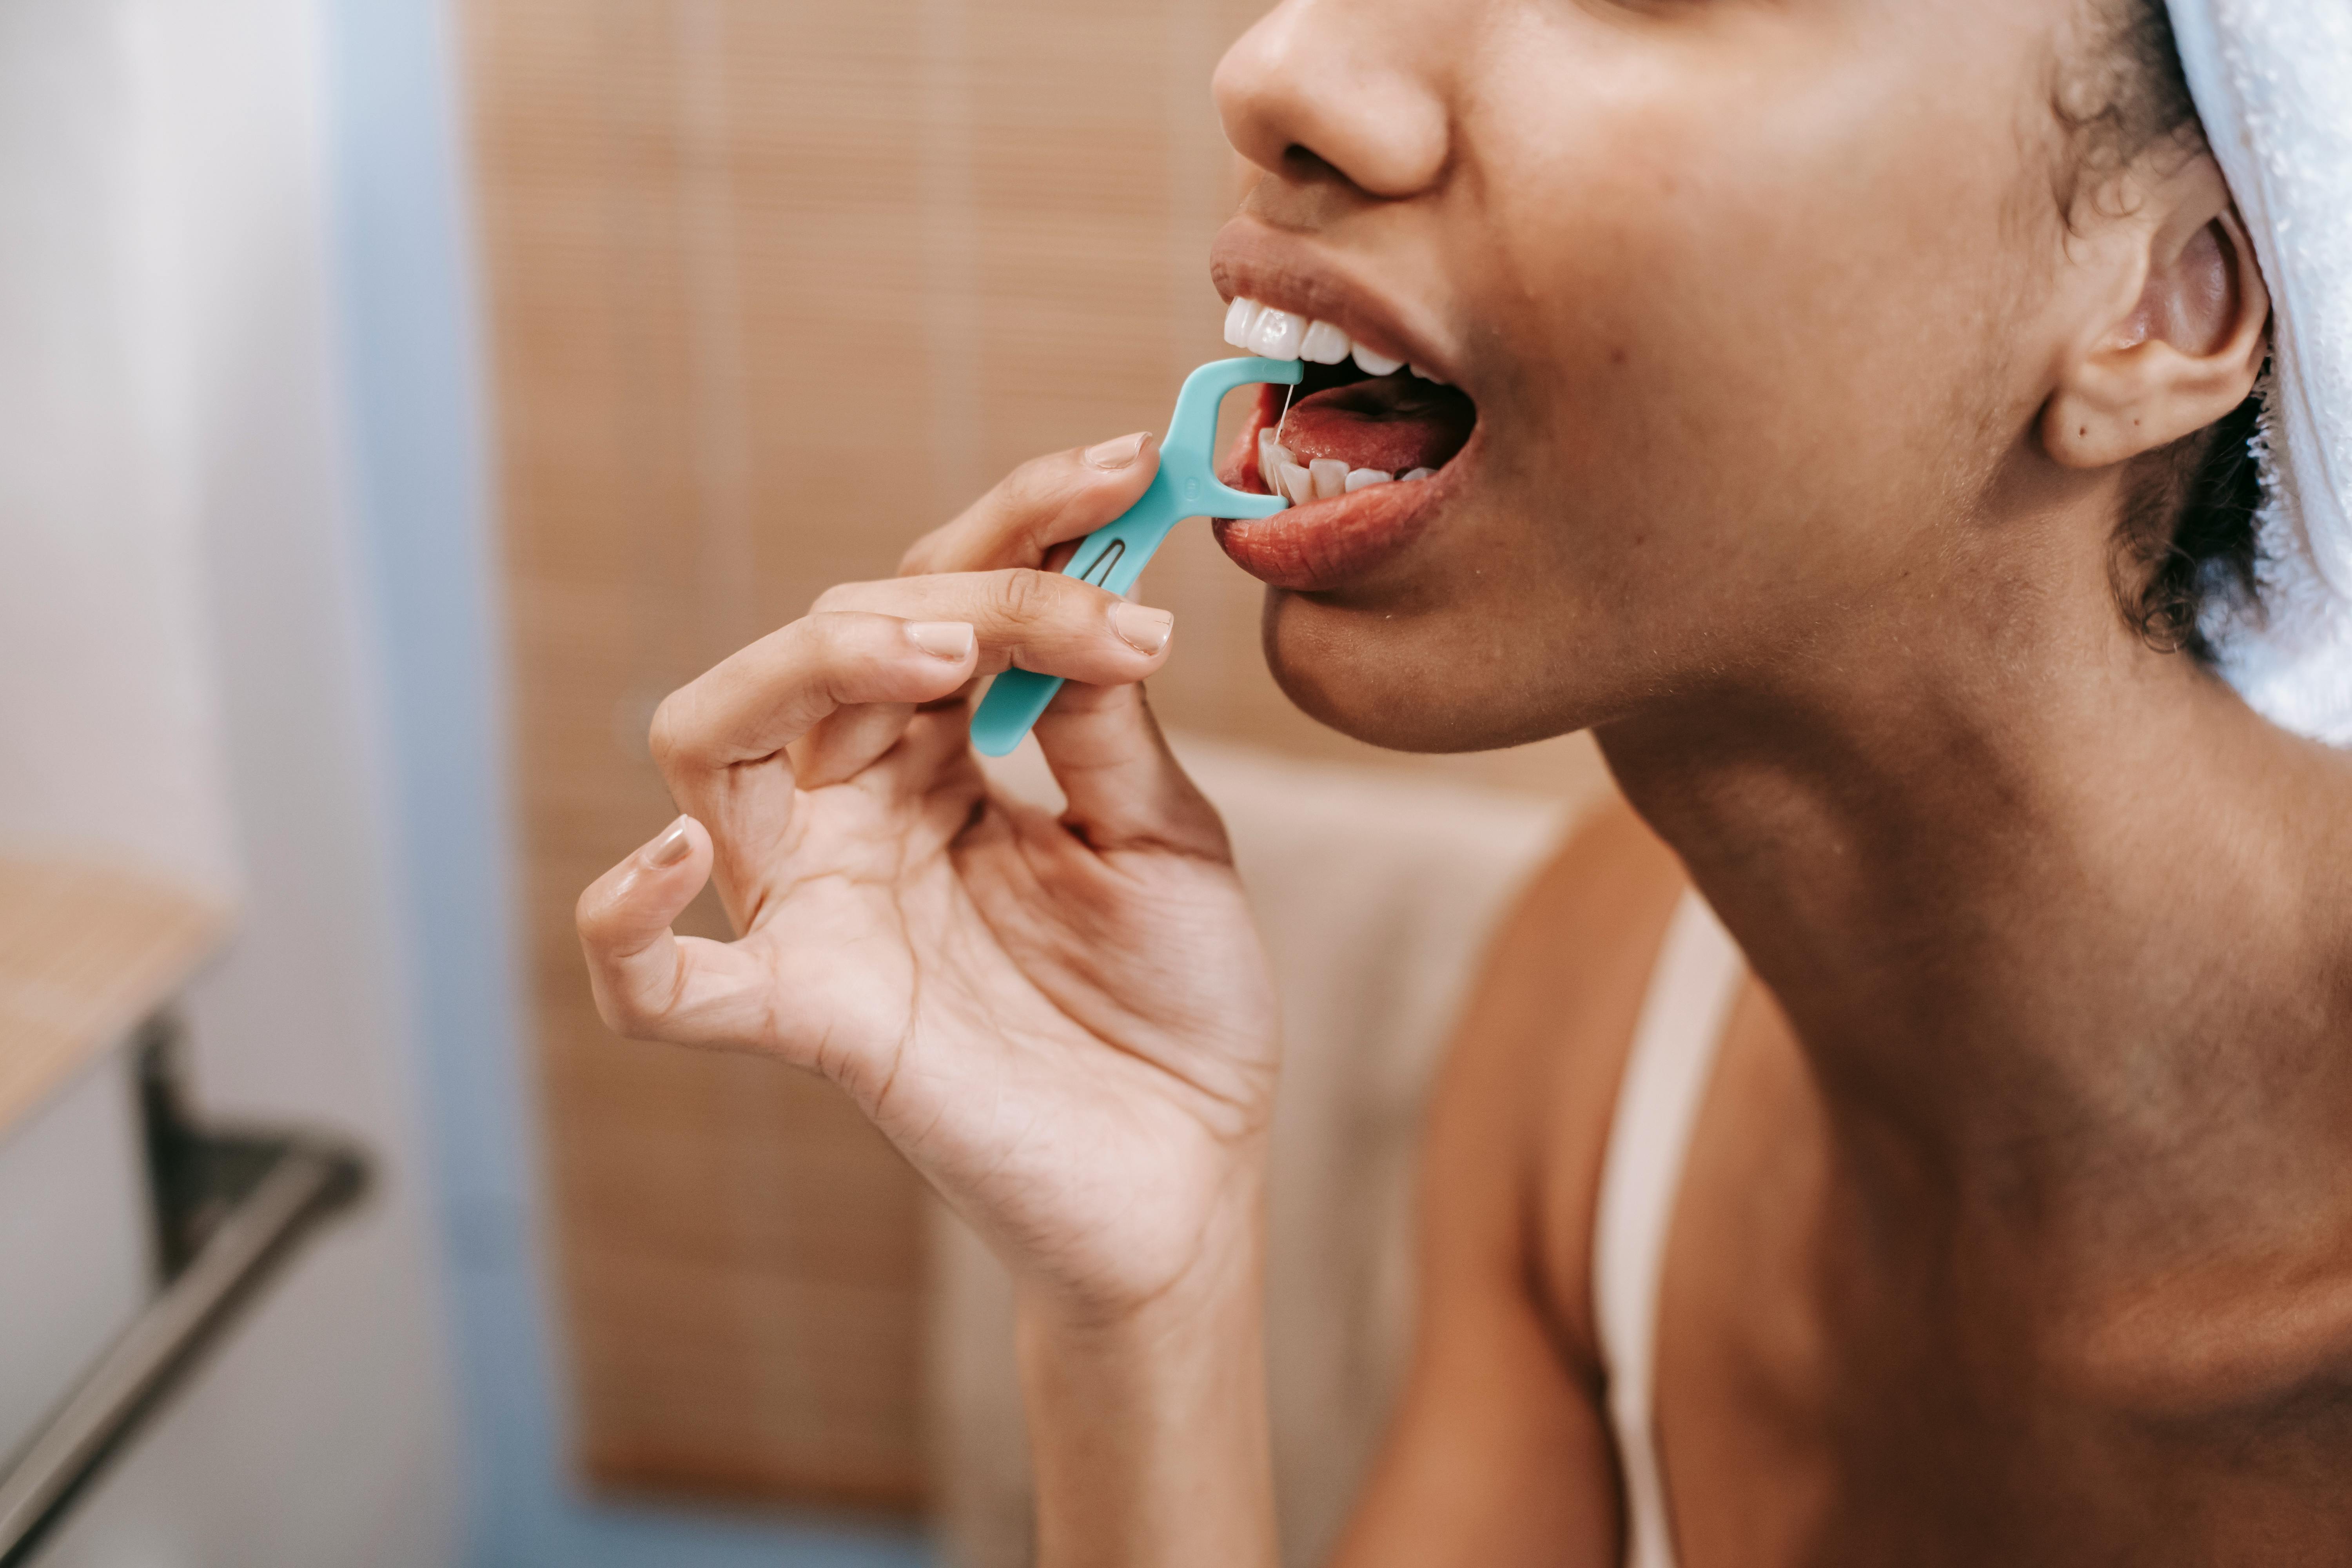
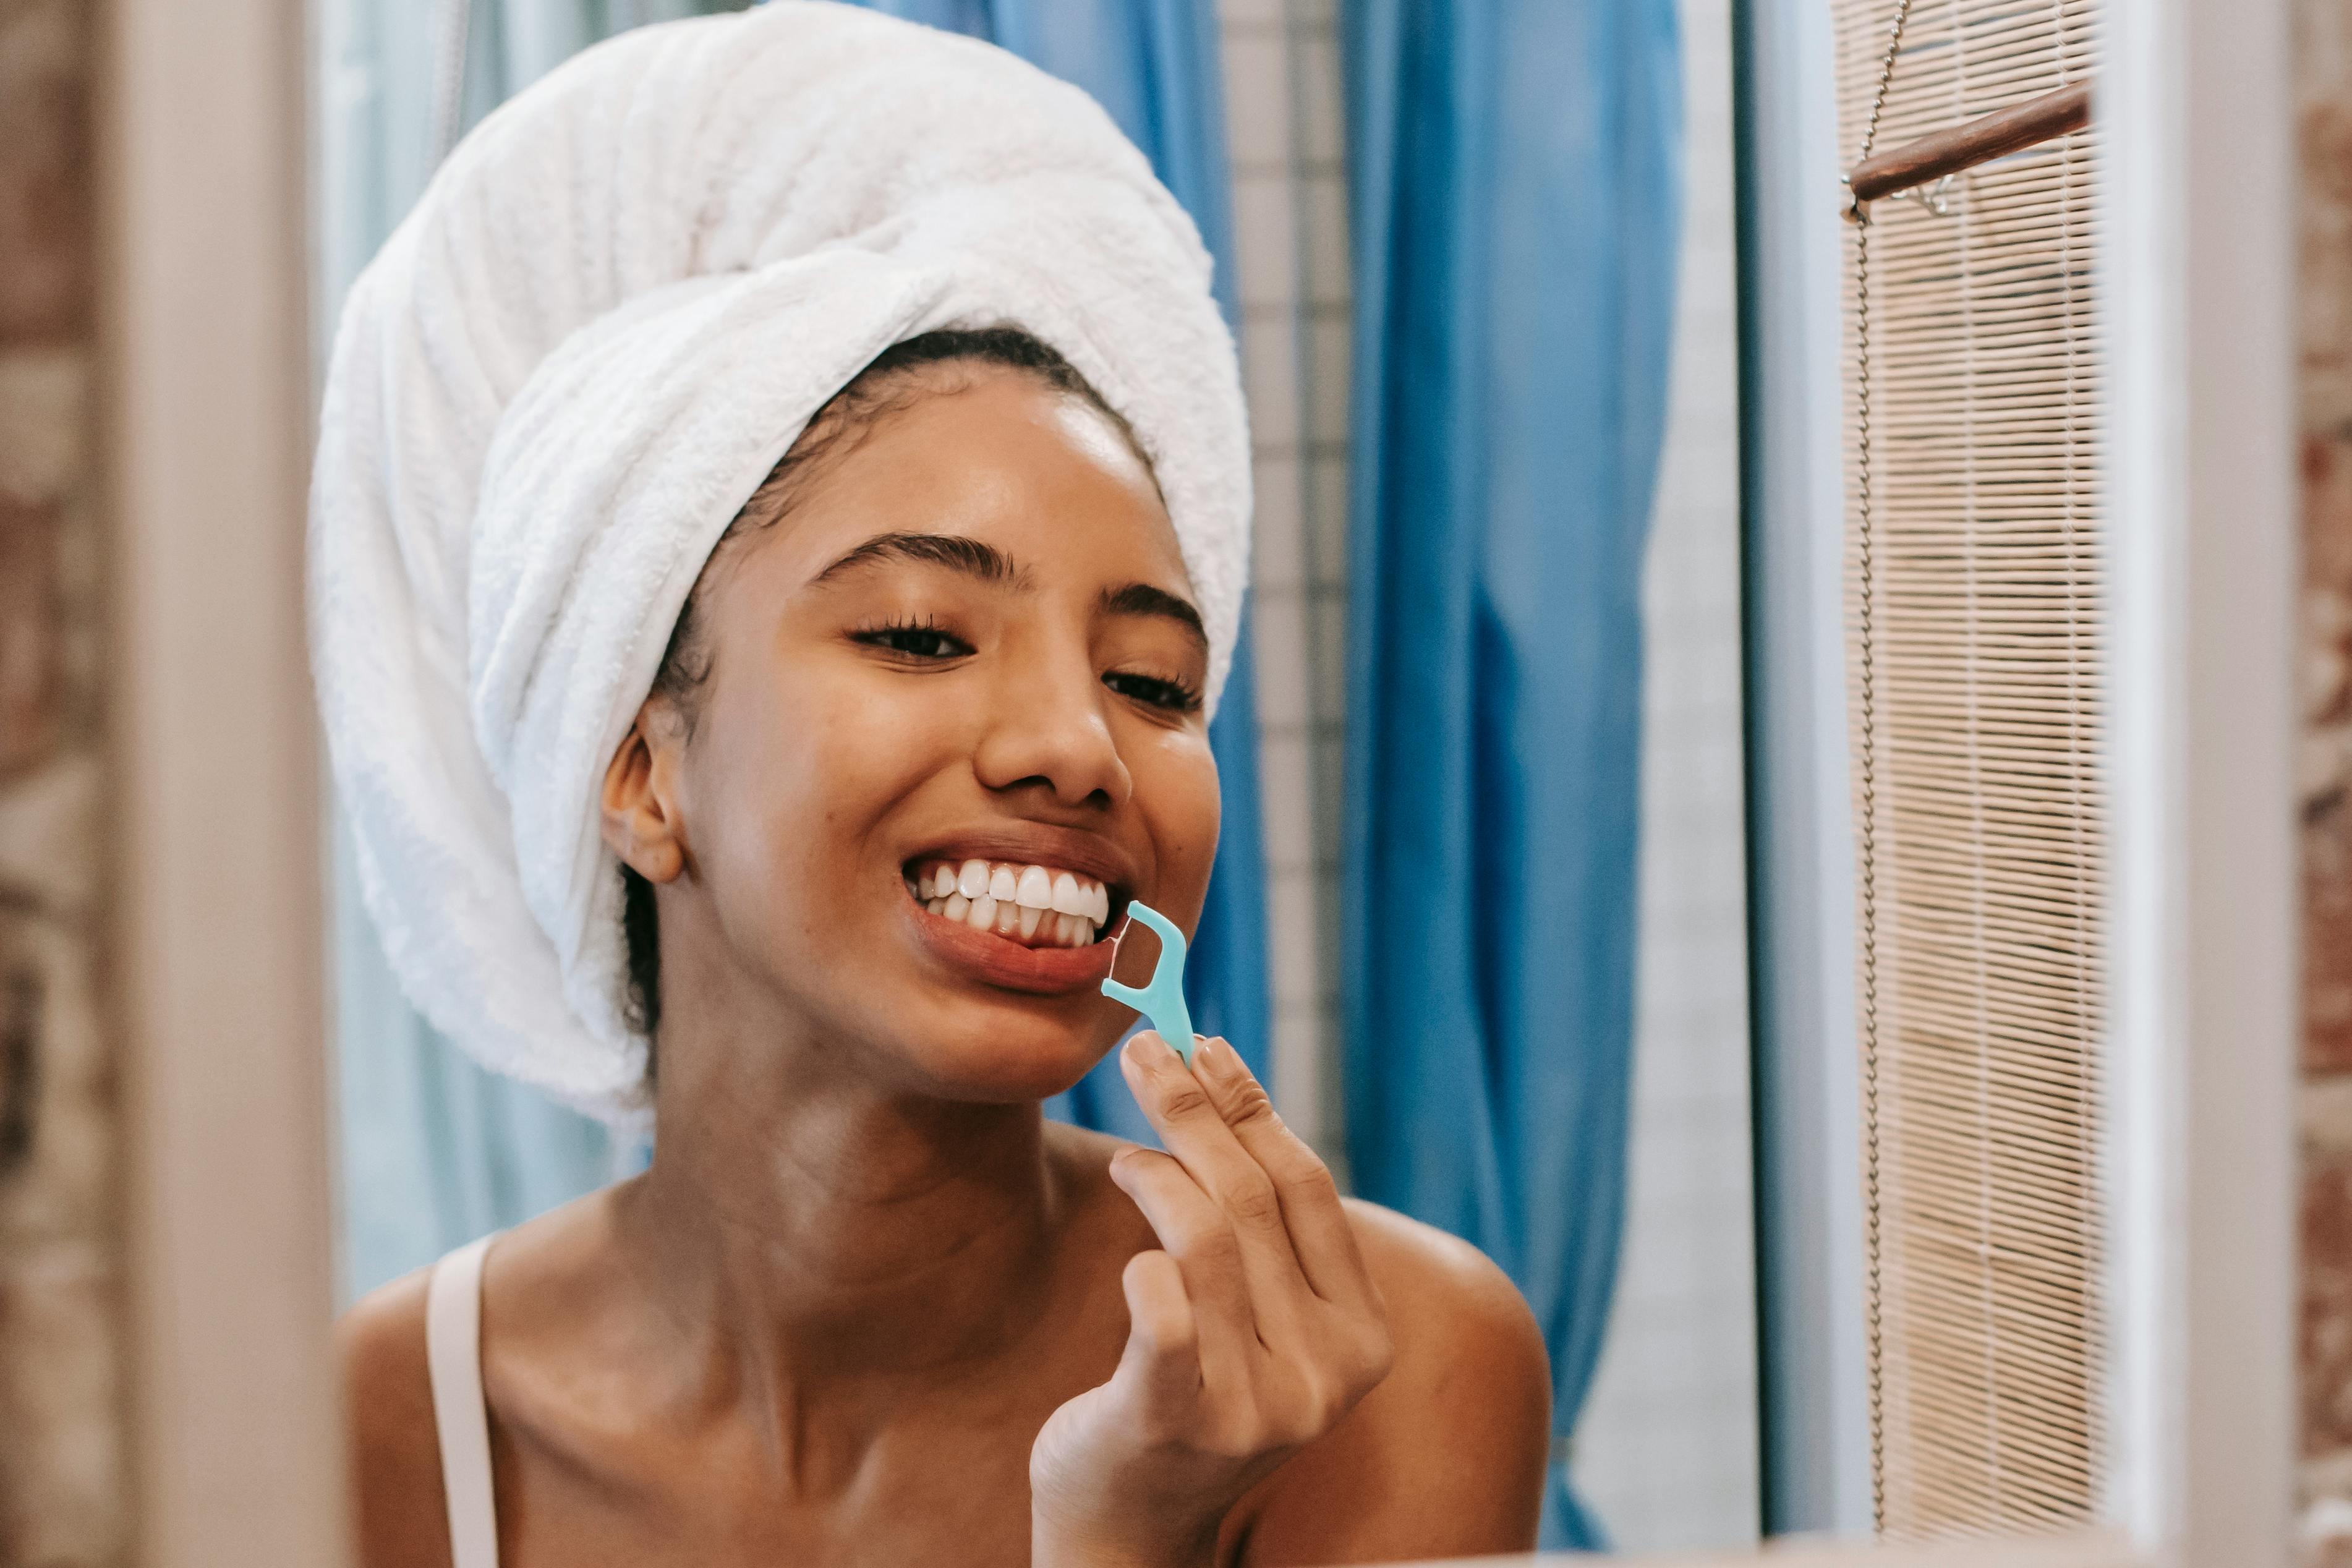
One helpful tip for flossing with braces is to use a “floss threader” or “floss pick.” These tools are designed specifically for people who wear braces and make it easier to get the dental floss around the wires and brackets. A floss threader is essentially a long needle-like tool that has a loop at one end that holds dental floss in place.
It might take some practice to get used to using a dental threader or pick when flos
Preparing The Floss For Braces
Flossing with braces can be a bit tricky, but it’s an important part of oral hygiene. It helps to remove plaque and food particles from the difficult-to-reach areas around the brackets and wires. The key is to use the right type of floss and to be gentle when flossing.
The first step in preparing the floss for braces is to choose the right type. Waxed floss is recommended because it slides more easily between teeth and it won’t get caught on the wires. Unwaxed floss can be used, but it may be harder to maneuver around the braces.
Once you have selected a type of floss, you’ll need to thread it through your braces. Start by wrapping one end of the floss around your middle finger, then use your thumb and index finger to slide it through a bracket or wire on one side of your mouth. Then pull the floss through until you have a few inches on both sides between your fingers.
Next, gently slide the floss up and down between each tooth in a sawing motion, making sure to go below the gumline each time. When you reach the next bracket or wire, use your index finger to push it through and continue down until all teeth have been flossed. Make sure not to force or snap the floss as this could damage your braces or gums.
Finally, rinse with water when you’re done to make sure any remaining food particles are gone before brushing your teeth with toothpaste as usual. Flossing with braces may take some getting used to but once you get into a routine it will become easier over time!
Threading The Floss Through Braces
Brushing and flossing your teeth with braces can be a difficult task. While it may seem impossible, threading dental floss through your braces is an essential part of maintaining good oral hygiene. Without regular flossing, plaque can build up and cause cavities or gum disease. It is important to practice this routine even when you have braces.
The best tool to use when flossing with braces is a floss threader. This tool helps you weave the dental floss under the archwire of the braces without having to worry about fraying or breaking it. When using a floss threader, start by feeding one end of the floss through the eye of the threader and then insert the threader into your mouth. Make sure your fingers are dry so that you can easily maneuver it between your teeth.
Once the threader is in place, gently guide it underneath the archwire of your braces and pull it through until you have enough slack to start flossing. Use a gentle back-and-forth motion, making sure to clean each side of each tooth as you go along. When finished, pull the threader out and discard it in a trash can.
If you do not have access to a floss threader, there are alternative methods for cleaning between your teeth while wearing braces. Waxed dental floss is more likely to slide smoothly between wires without fraying or breaking than regular dental floss, making it easier to maneuver around brackets and archwires. You can also use an interdental brush or an oral irrigator if needed.
Flossing with braces takes extra time and patience but is essential for preventing cavities and gum disease while wearing braces. Taking these extra steps while caring for your teeth will help keep them healthy in the long run!
Cleaning The Teeth Effectively With Floss
Flossing is an important part of any good oral hygiene routine. It helps to remove plaque and food particles from between the teeth, which can help prevent cavities, gum disease, and other dental problems. Flossing also helps to keep your breath fresh and your smile looking its best. While flossing can be intimidating or time consuming for some people, with a few simple tips you can make it a regular part of your oral care routine.
The first step in using floss is to choose the right type for your needs. There are several types of floss available, including waxed and unwaxed varieties, as well as flavored and unflavored options. You should also consider the thickness of the floss: thicker floss can be more difficult to get between some teeth, while thinner floss may not be strong enough for larger gaps. Once you’ve chosen the right type of floss for you, it’s time to get started.
To begin flossing, take about 18 inches (45 cm) of floss and wrap it around each index finger so that there are a few inches between them. Hold the ends tightly between your thumbs and index fingers so that you have an inch or two of taut floss between them. Gently guide the taut floss between each tooth in an up-and-down motion; make sure to get all sides of each tooth in this motion. Once you reach the gumline, curve the floss into a C shape against one tooth and slide it up and down against each side of that tooth before moving on to the next one.
When you’re done cleaning each tooth area with a single piece of floss, use clean sections on either side until all areas have been cleaned at least once. Don’t forget to also clean behind your back teeth! Finally, rinse with water or mouthwash before brushing as normal.
Flossing may take some time to get used to at first but with practice it can become an easy part of your daily oral hygiene routine. Regular use will help ensure that your teeth stay healthy and free from plaque buildup – so don’t forget to add it into your daily routine!
Removing Food Particles From Between Teeth And Gums
Removing food particles from between teeth and gums is an important part of oral hygiene. If left unchecked, these particles can cause plaque and bacteria to build up, which can lead to tooth decay and gum disease. To help prevent this from happening, it’s important to remove food particles from between teeth and gums regularly.
The best way to do this is by flossing. Flossing helps to remove food particles that may be lodged in between teeth and gums. It also helps to reduce the amount of plaque buildup that can occur when left unchecked. When flossing, it’s important to use a gentle and slow motion as too much force can cause the gums to be damaged or irritated.
Another way to help remove food particles from between teeth and gums is by using an interdental brush or a water flosser. These tools are designed specifically for cleaning between teeth and are great for getting into hard-to-reach areas where floss may not be able to reach. They can also help reduce the amount of plaque buildup that can occur when left unchecked.
It’s also important to brush your teeth on a regular basis as this will help remove any food particles that may be stuck on the surface of your teeth before they have a chance to get into the spaces between them. Additionally, regular brushing will help keep your breath smelling fresh and your mouth feeling clean and healthy.
Finally, it’s important to visit your dentist or dental hygienist regularly for professional cleanings. During these appointments, they will be able to get into those hard-to-reach areas where food particles may have become lodged in order to ensure that your mouth remains healthy and free of decay or disease-causing bacteria.
Careful Use Of Floss On Gums
Flossing is an essential part of good oral hygiene and it is important to use it correctly. While flossing can help remove plaque and food particles from between your teeth, it can also be damaging to your gums when done improperly. Therefore, it is important to use a gentle touch when flossing around your gums.
If you are new to flossing, or if you have sensitive gums, you may want to consider using a waxed floss. This type of floss will be less likely to cause irritation or damage to your gums. When using waxed floss, take care not to pull too hard when sliding the floss between your teeth – be gentle.
When flossing, make sure that you are using a clean section of the floss each time you move on to another tooth. This will help prevent bacteria from spreading from one tooth to another. In addition, make sure that you are using a slow and steady motion when sliding the floss between your teeth – do not saw back and forth as this can cause damage or irritation of the gums.
If you experience pain while flossing, stop immediately and check for any signs of irritation or bleeding on your gums. If this occurs, give your gums time to heal before continuing with your oral hygiene routine. If pain persists after two days, please contact your dentist for further advice and treatment options.
By following these tips for careful use of dental floss on your gums, you can help keep them healthy and strong while avoiding painful irritation or damage caused by improper technique.
Finishing Up The Flossing Session With Braces
Flossing with braces can be a bit tricky, but it’s important to keep your teeth and gums healthy. When you have braces, it’s even more important to make sure you floss regularly and properly. Here are some tips on how to get the most out of your flossing session with braces:
First, use waxed floss to make the process easier. Waxed floss slides easily between the wires and brackets of your braces, allowing you to reach all of the areas that need cleaning. Unwaxed floss can be difficult to maneuver around your braces and might not be as effective.
Second, use a floss threader if necessary. A floss threader is a small plastic loop that helps you guide the floss underneath the wires and brackets of your braces. This makes it easier to get in between all of the hard-to-reach spots.
Third, use gentle motions when you’re flossing around your braces. Floss too vigorously and you could damage the wires or brackets of your braces. Make sure to take your time so that you don’t accidentally cause any damage.
Finally, rinse your mouth out with water after you finish flossing. This will help remove any food particles that may have been left behind during the process. You’ll also want to brush after flossing so that any plaque or tartar buildup can be removed.
By following these tips, you’ll be able to keep your teeth and gums healthy while wearing braces. Remember, regular brushing and flossing habits are essential for good oral health no matter what kind of orthodontic treatment you have!
Conclusion
Flossing with braces is an essential part of oral hygiene and should not be neglected. With proper technique, flossing with braces is possible and easy. Take your time to ensure the floss slides underneath the arch wire, behind the brackets, and between the teeth. If you are having difficulty, ask your orthodontist for help or consider using a floss threader or water flosser. Regular flossing with braces will help keep your teeth healthy during your orthodontic treatment.
Good oral hygiene is essential for maintaining healthy teeth and gums while wearing braces. Flossing with braces may seem difficult at first, but with practice and patience, it can be easy and effective. Remember to take your time when flossing and pay attention to all areas of the mouth to ensure all plaque is removed from between the teeth. With regular brushing and flossing, you can keep your smile healthy during orthodontic treatment.